How to Set Up Two-Factor Authentication (2FA) in KeePass for Enhanced Security
Learn how to enable two-factor authentication (2FA) in KeePass 2.51. This guide walks you through creating a new entry, configuring OTP settings, and using 2FA codes to protect your accounts with an extra security layer.


In today’s digital landscape, protecting your online accounts with just a strong password is no longer enough. Two-factor authentication (2FA) adds an essential second layer of security by requiring a one-time code in addition to your password. With version 2.51, KeePass—a free and trusted password manager—makes it easy to integrate 2FA into your workflow.
This guide will show you how to enable 2FA for a new entry in KeePass using its built-in OTP generator. With just a few configuration steps, you can greatly improve the security of your password-protected accounts.
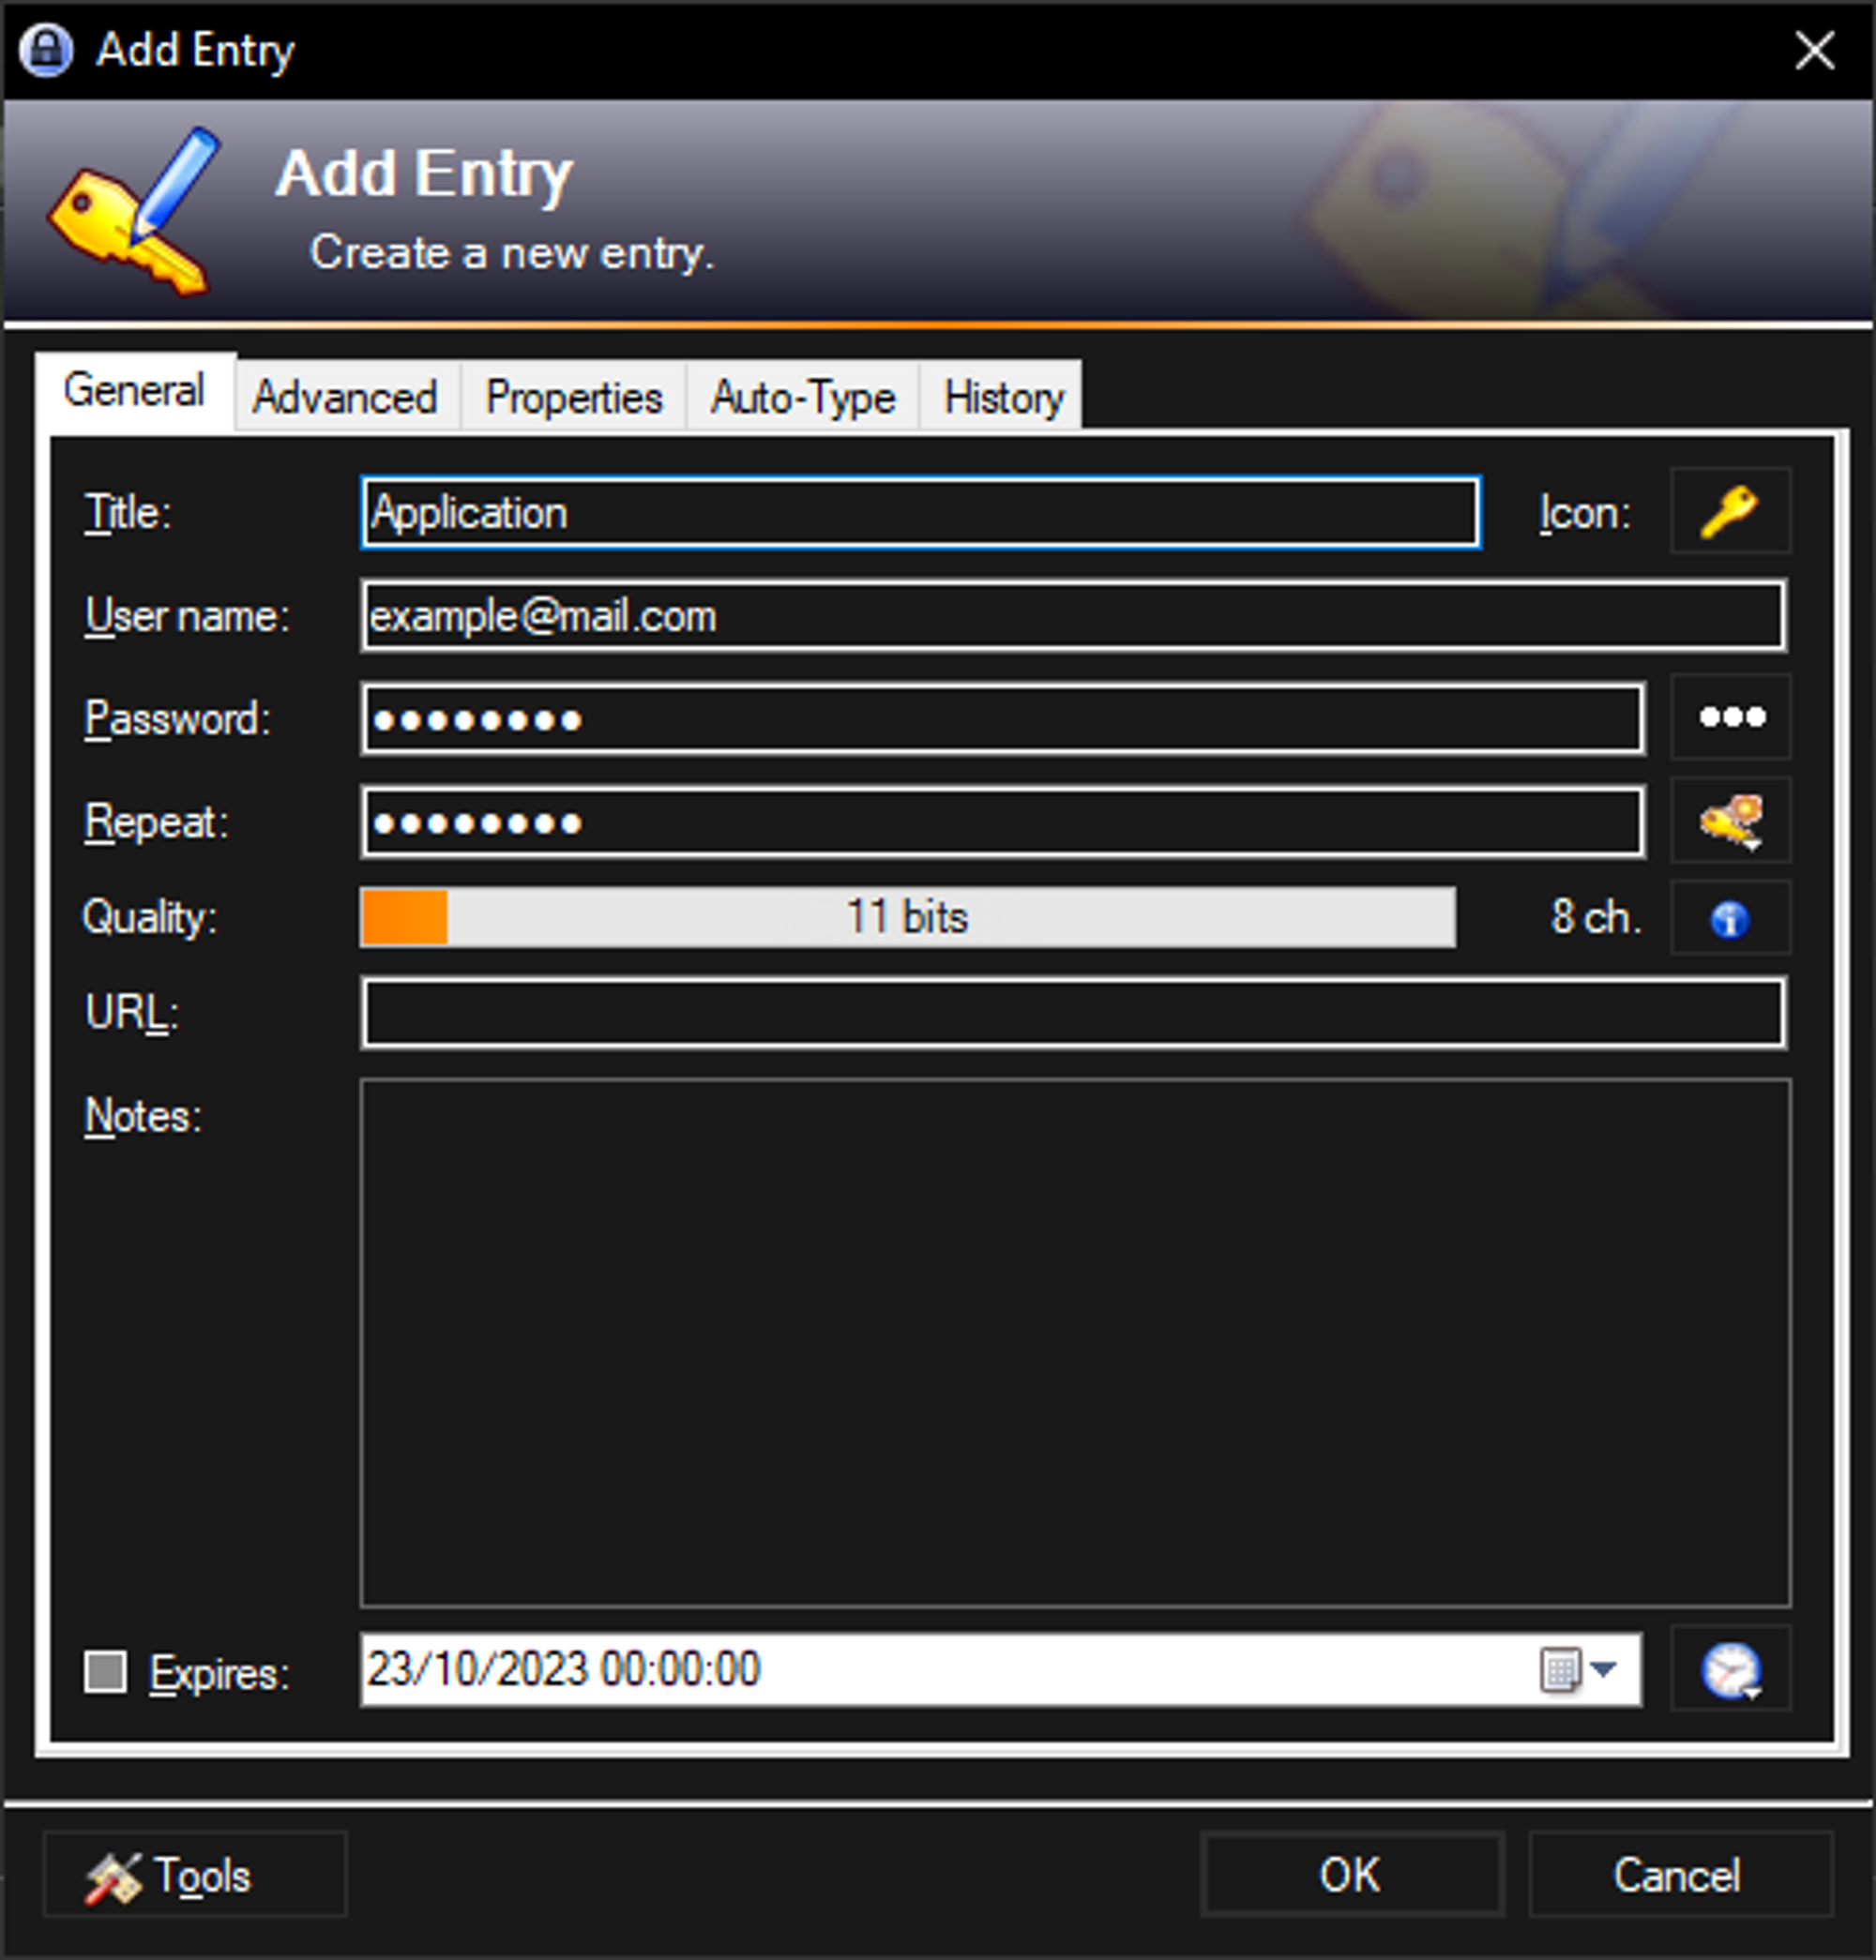
Create a New Entry in KeePass
To begin using 2FA, you'll first need to create a new KeePass entry:
- Open KeePass
- Click the Add Entry button or use the shortcut
Ctrl + I
In the dialog that appears, enter your usual credentials:
- Title (e.g., the name of the service)
- Username
- Password
This entry will serve as the foundation for your 2FA setup.
Set Up 2FA Using OTP Generator Settings
Once your entry is created, follow these steps to configure 2FA using a shared secret:
Access OTP Settings
- Navigate to the Advanced tab within your entry.
- In the String Fields section, click More, then select OTP Generator Settings.
Enter the Shared Secret
You’ll need a secret key from the service you're setting up 2FA for (usually available as a QR code or alphanumeric string in your account settings).
- Paste this key into the Shared Secret field.
- For this guide, we’re using a sample key:
SuperSecretToken.
Leave other settings at their default values unless the service you're using specifies otherwise.
Click OK to save your configuration.

You’ll now see a time-based one-time password (TOTP) generated inside KeePass.
Use the 2FA Code During Login
Once you've configured the OTP generator:
- Use
Ctrl + Tin KeePass to copy the 2FA code to your clipboard. - Paste the code into the verification field when logging into the associated account.
This functionality eliminates the need to use a separate authenticator app and allows KeePass to become your one-stop tool for both passwords and 2FA codes.
Ensure Your Setup Is Working
After completing the steps:
- Log into the service using your username and password from KeePass.
- When prompted for a 2FA code, use the one generated by KeePass.
- If the service accepts the code, your configuration is successful.
You can also cross-check the code in KeePass with your authenticator app to ensure they’re in sync.
Conclusion
Enabling two-factor authentication in KeePass provides a practical and secure way to manage both passwords and one-time codes in a single place. With version 2.51 and newer, adding OTP support is simple and enhances your defense against unauthorized access.
By following this guide, you now have a more secure KeePass setup that helps safeguard your most important accounts. For more information on KeePass features and plugin support, visit the official KeePass documentation.


