How to Set Up Visual Studio for SSIS Package Development
Learn how to configure Visual Studio for SSIS package development by installing SQL Server Data Tools (SSDT) and necessary extensions. Follow this step-by-step guide to start building powerful data integration solutions with SSIS.


When working with SQL Server Integration Services (SSIS), having the right development environment is essential. Visual Studio, paired with SQL Server Data Tools (SSDT), offers a powerful interface for designing, testing, and deploying SSIS packages. However, out of the box, Visual Studio doesn’t always come ready for SSIS development—you’ll need to install a few components first.
This guide will walk you through the process of configuring Visual Studio for SSIS development, including installing SSDT and the necessary SSIS project extension. Whether you're new to SSIS or just setting up a new machine, this tutorial will help you get started quickly and efficiently.
What Is an SSIS Package?
SSIS (SQL Server Integration Services) packages are essential tools for automating data workflows. These packages help move and transform data between different sources such as databases, spreadsheets, APIs, and flat files.
Think of an SSIS package as a workflow or recipe that fetches data, applies transformations, and loads the final result into a target system. These packages support automated scheduling and can be managed via SQL Server Agent or other orchestration tools, making them ideal for enterprise data integration.
Some common use cases for SSIS packages include:
- Importing data from Excel or CSV into a SQL Server database
- Transforming and cleansing raw data for reporting
- Synchronizing data between systems or environments
With Visual Studio’s graphical interface, building SSIS packages becomes a low-code, intuitive process—once everything is configured correctly.
Prerequisites for SSIS Development in Visual Studio
Before you can start creating SSIS packages, make sure you have:
- Visual Studio 2019 (or later) installed
- Visual Studio Installer available on your system
If you're missing either, you can download Visual Studio Community Edition and install the Visual Studio Installer along with it.
Install SSDT for SSIS Development
To add SQL Server Data Tools and SSIS support to your Visual Studio installation:
Step One: Launch the Visual Studio Installer
Open the Visual Studio Installer application on your system. This tool manages all your Visual Studio components.
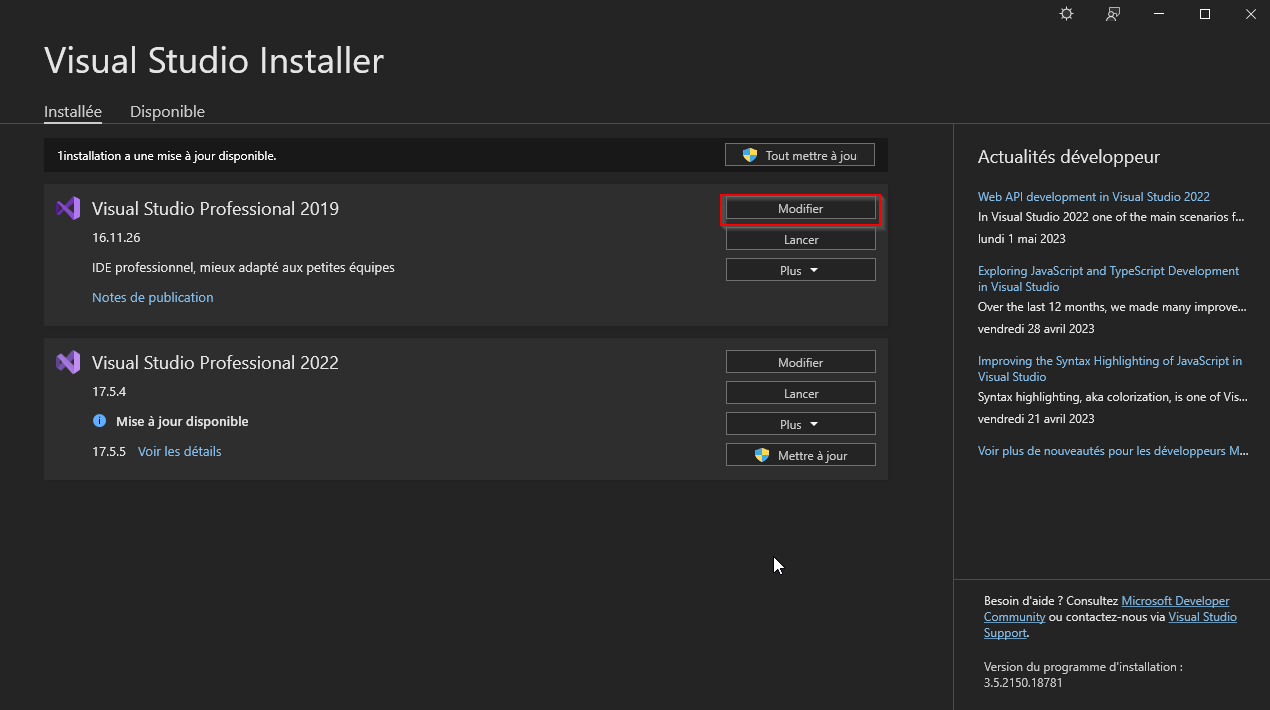
Step Two: Modify Your Installed Visual Studio Version
In the list of installed Visual Studio versions, locate the one you want to configure. Click the Modify or Update button depending on your current setup.
Step Three: Add the Data Storage and Processing Workload
Search for the Data storage and processing workload. Select it by checking the box. Make sure SQL Server Data Tools is also checked within this workload.
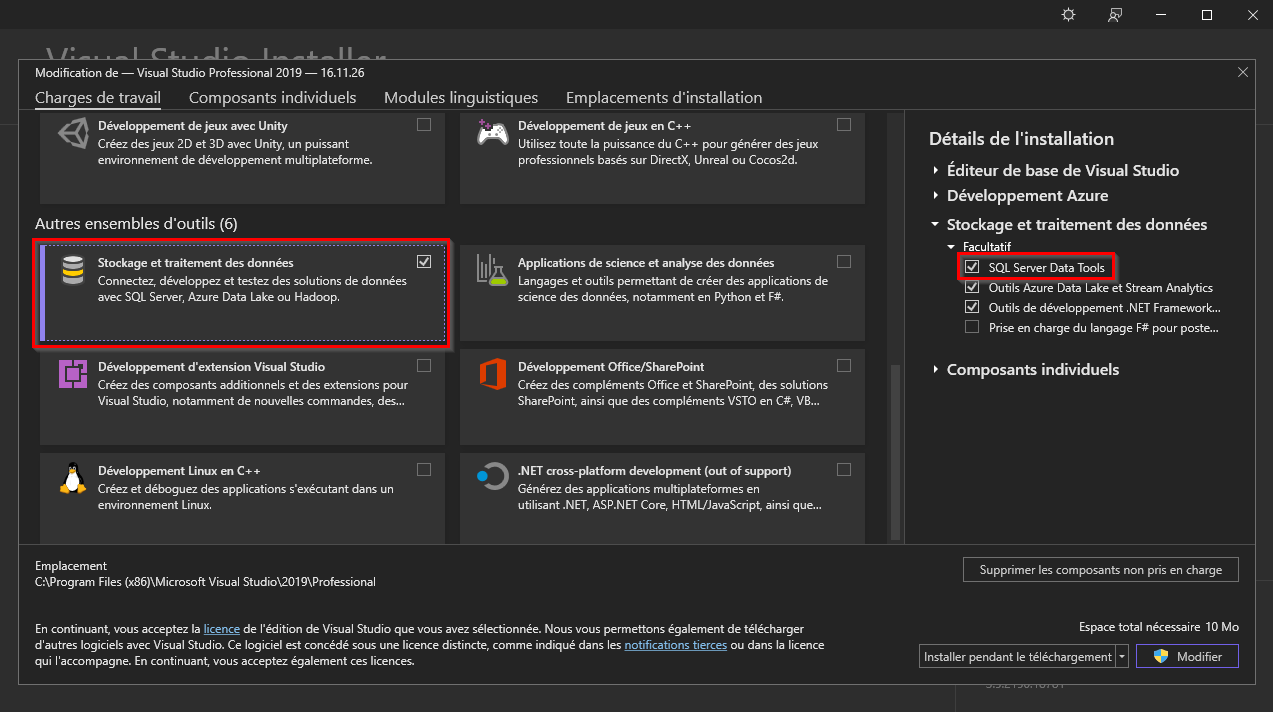
Click Modify or Update (bottom-right corner) to begin installing the selected components.
Install the SSIS Project Extension
Once SSDT is installed, you’ll need the SSIS project template.
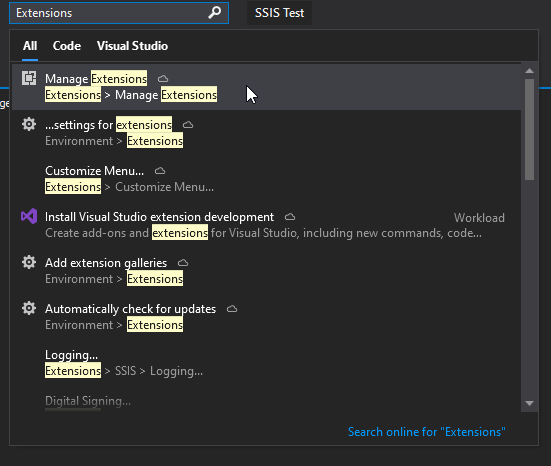
Step One: Manage Extensions in Visual Studio
Open Visual Studio, search for Extensions in the top search bar, and click Manage Extensions.
Step Two: Download the SSIS Project Extension
In the Online section of the extensions window, search for SQL Server Integration Services Projects.
Download the extension. Once the download is complete, a file named Microsoft.DataTools.IntegrationServices.exe will appear in your Downloads folder.
Step Three: Install and Restart
Run the downloaded executable and follow the installation steps. Once completed, restart Visual Studio.
Step Four: Verify Installation
After restarting, go to Create a new project in Visual Studio. You should now see SSIS project templates available.
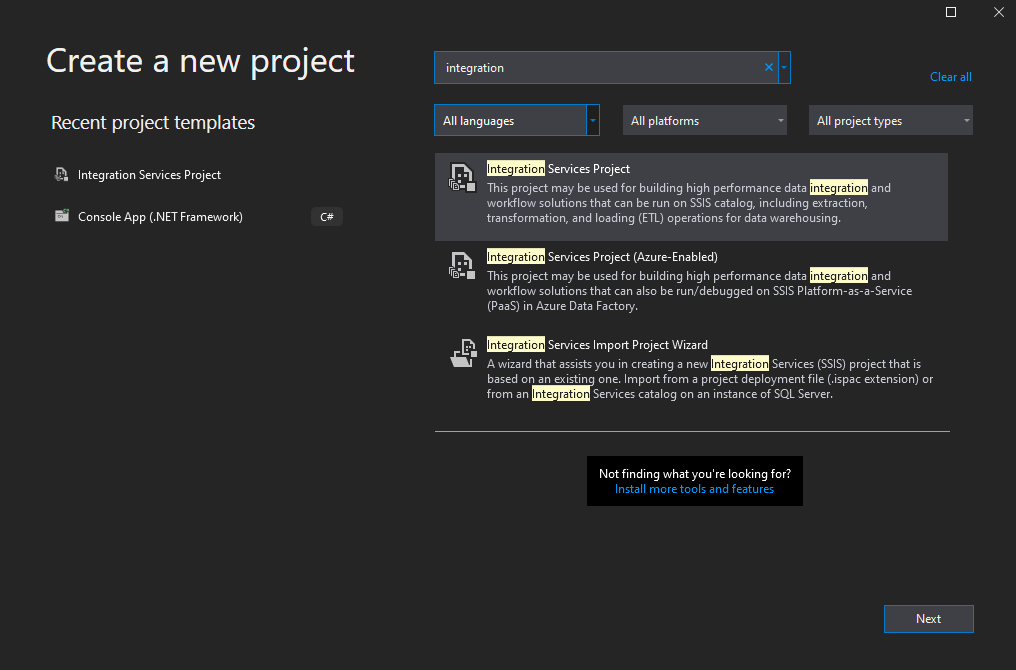
You are now ready to create and work with SSIS packages in Visual Studio.
Conclusion
Configuring Visual Studio for SSIS development is straightforward but requires a few essential steps. By installing SQL Server Data Tools and the SSIS extension, you unlock powerful data integration capabilities right within your IDE.
With this setup, you can start building robust SSIS packages for automating data flows between systems—perfect for tasks like ETL (Extract, Transform, Load), data migration, and real-time integration.
For more on SSIS features and real-world use cases, check out Microsoft's official SSIS documentation.
Ready to streamline your data workflows? Get started with your first SSIS project in Visual Studio today.


