How to Deploy a Symfony 6 REST API to a Production Server: Step-by-Step Guide
Learn how to deploy your Symfony 6 REST API to a production server with best practices for environment setup, Composer, database creation, and Apache configuration.


In this part, we will see the different important steps to follow when putting a Symfony application in production. The steps we will follow are not only applicable to an API but can also be applied to the production of a website.
To perform these steps, we will use the AlwaysData service. This one proposes a free offer of 100Mb including PHP and MySQL hosting, it is thus ideal for our API. This service allows us to quickly test an application in a production environment for free.
Create an account
If you already have an account on AlwaysData, you can proceed to the next step.
First, you will need to create a free account in order to access the service. To do this, go to the registration page and then follow the instructions to create your account. This should not take more than a minute.
Choose your offer
Once your account is created, you should be redirected to the next page asking you to choose your offer. In our case, we will choose the free offer with 100MB of storage.
We will then enter a name for our project and a password that will be used for the database, FTP and SSH access.

If you already have an account, just go to the Custom Area section, then Accounts and click on the Add account button. You will only have to enter the information we just mentioned.
File transfer
In order for our API to work on the remote server, we will have to send the different files we have created during development. To do this, we will use the FTP protocol. To make it easier for us, we are going to use Filezilla (If you use another FTP transfer software, you can use it, the configuration will be similar).
First of all, we will have to connect to the server. To do this, we will have to get some connection information that AlwaysData should give us.
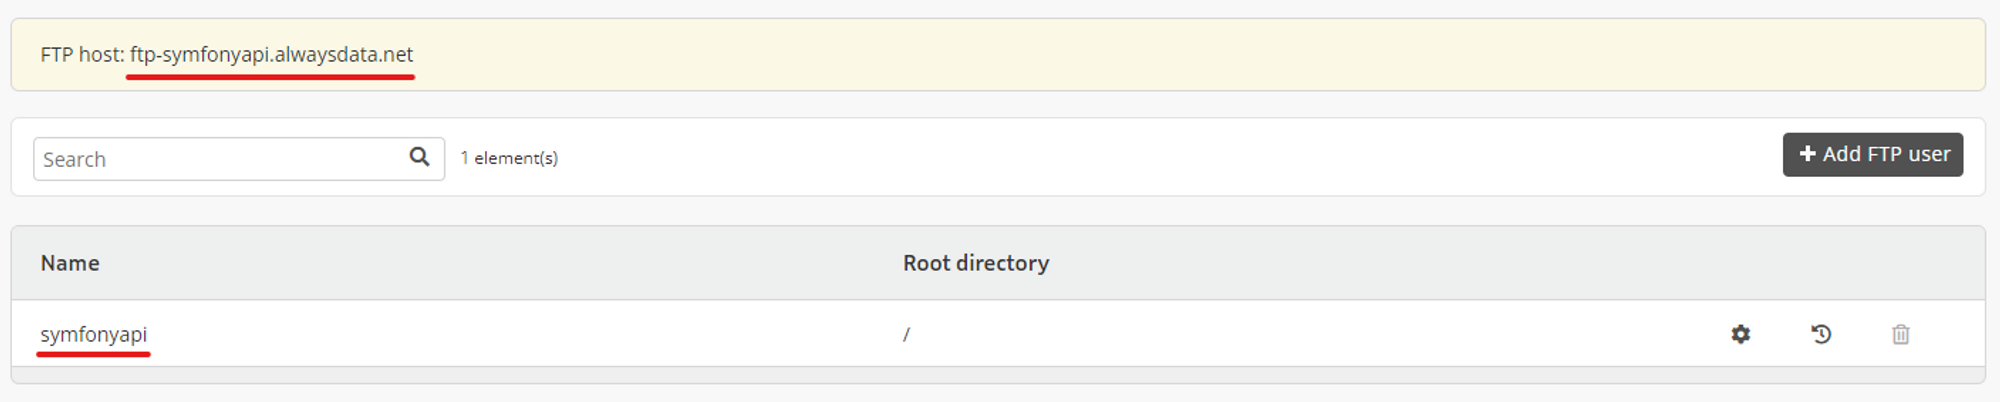
Let's start with the address of the FTP server. To get it, go to the Remote Access section and then FTP. At the top of the page, you should see the address in question. It should look like this: ftp-project_name.alwaysdata.net.
As for the username and password, this is simply the information you filled in earlier. The username will be in lower case.
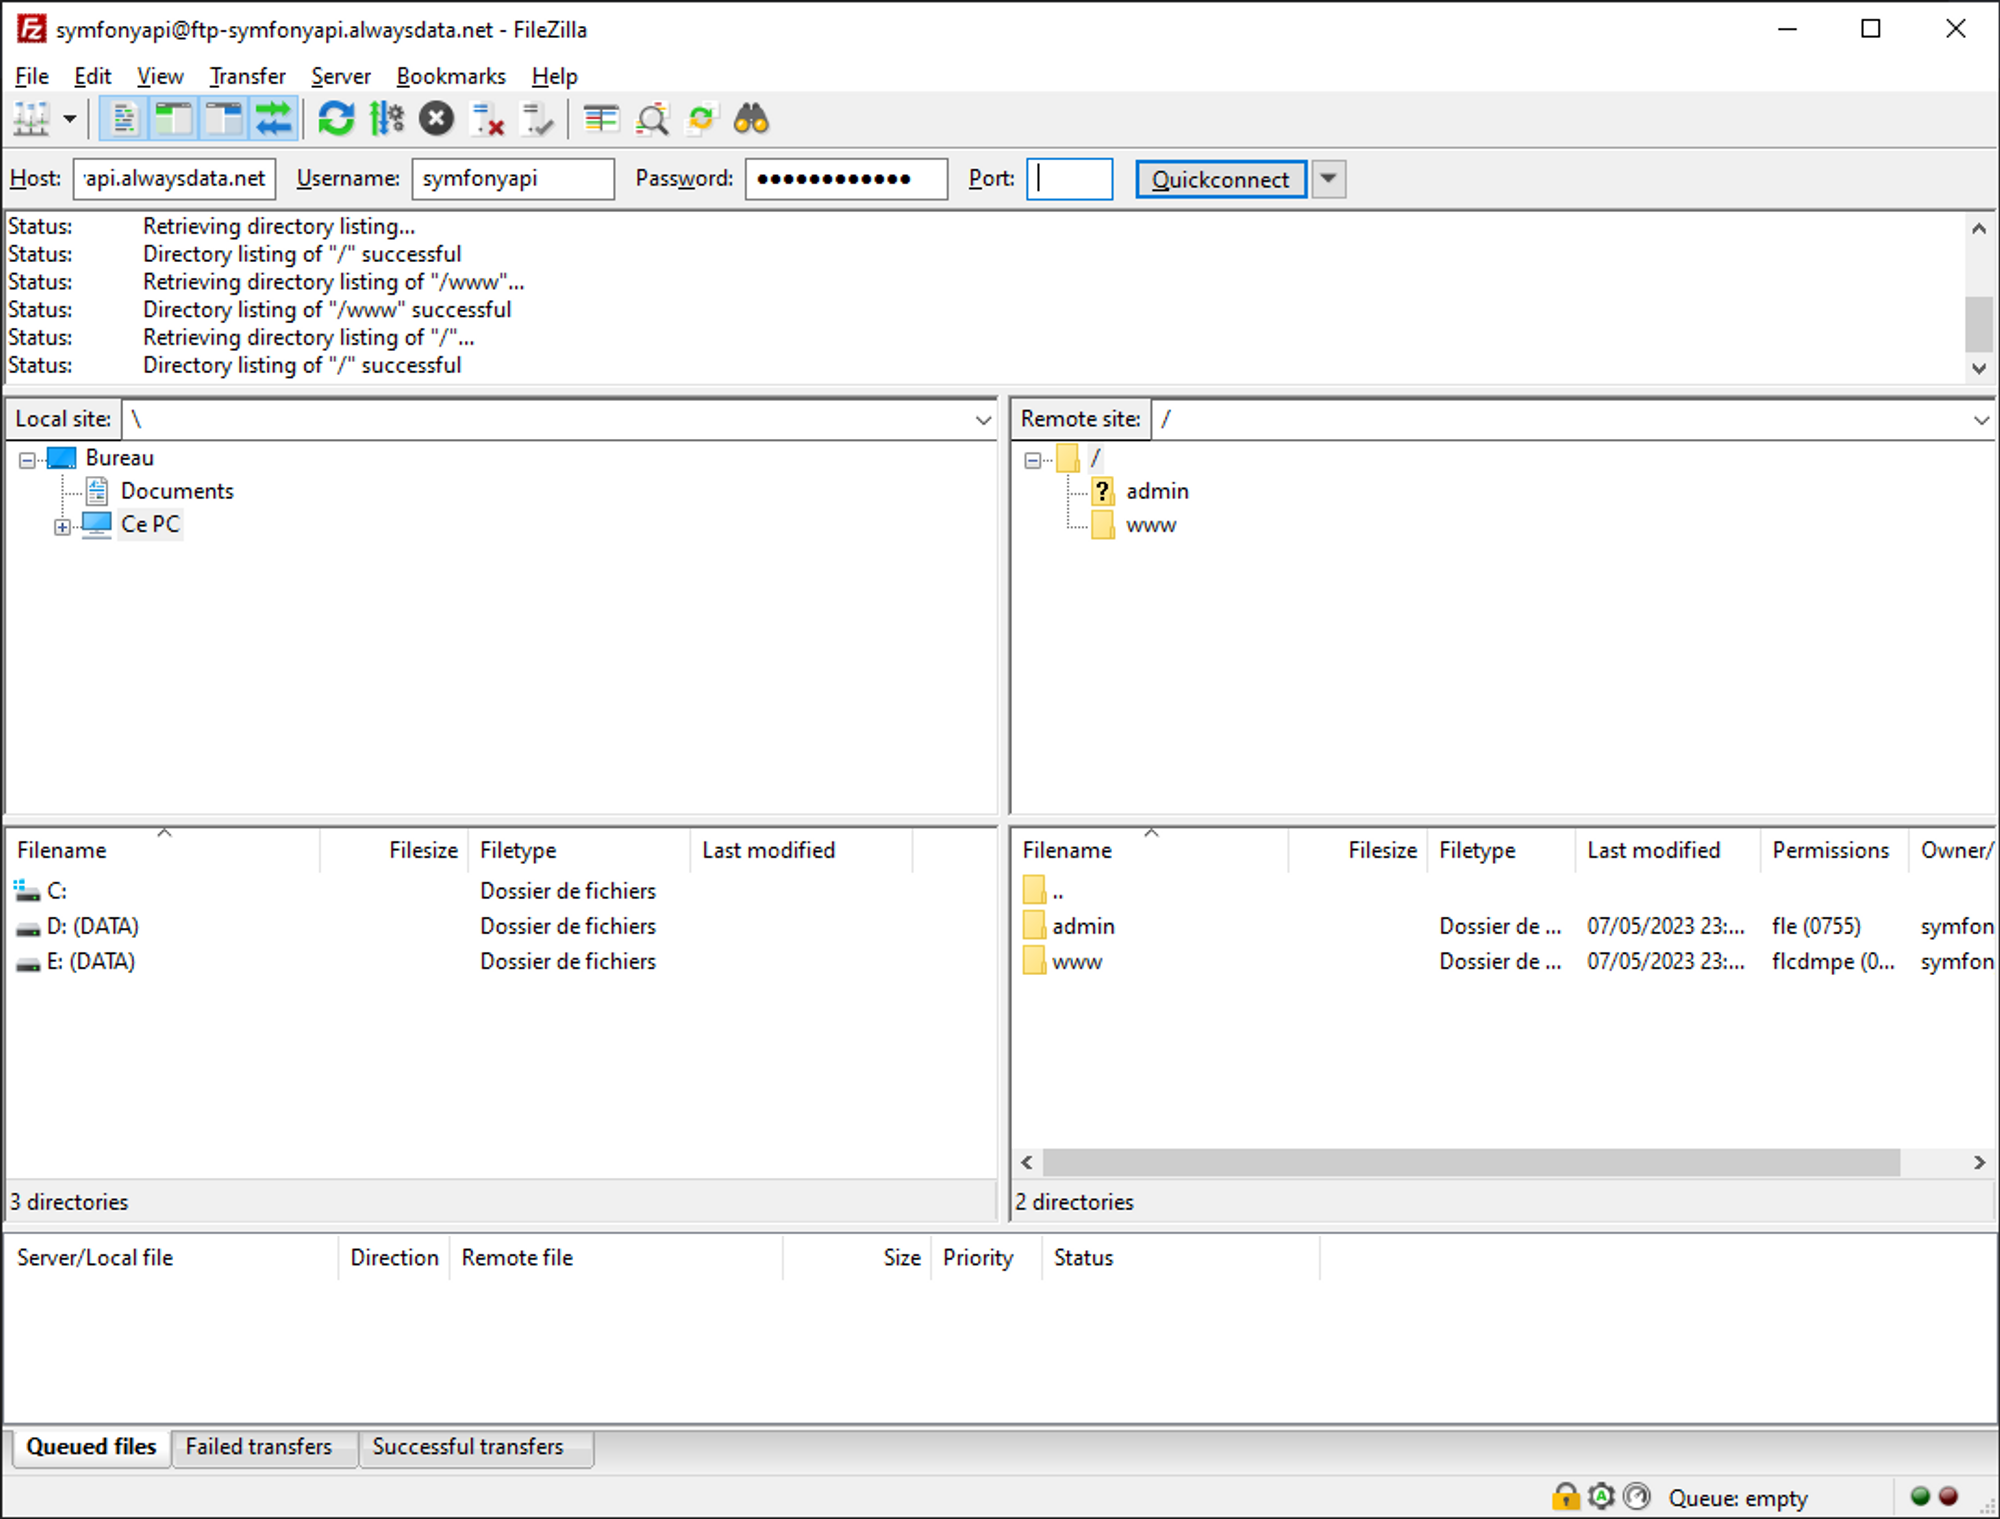
Once connected to the server, we will just have to transfer the files. First, open the www folder located on the right side of the window. You should see an index.html file. You can leave it for now.
Now just drag and drop the project files from your computer to the www folder on the server.
vendor and var folders. These can be regenerated later on the server.You should now see all the files in the lower right-hand corner.
Checking the versions
Before continuing, we will have to make sure that the versions of the languages correspond to the ones we use locally.
Actually, we only need to check the version of PHP as it is the only language we use. To do this, go to the Environment section and check the version indicated for PHP. This should be a version 8.1. Take for example the last available version which starts with 8.1, for me, it is 8.1.17.
Then click the Submit button at the bottom of the page to save.
Project configuration
As for the transfer of files via FTP, we will have to connect to the server via the SSH protocol thanks to the login to continue the configuration of the server and our project.
SSH account configuration
First of all, we'll need to modify the existing SSH user so that we can connect with it.
In the Remote Access section, then SSH, we will click on the setting icon for the symfonyapi user.
We will then check the box to Enable password login.
Then click Submit to save the changes.
Now we can connect to the server using this user. There are two possible methods:
- Use the web version of the terminal
- Use an external terminal on your computer that supports the SSH protocol like Git Bash
For me, I will use the second option but both are possible.
If you want to connect through the web version, just click on the web link in the Remote Access section and then SSH. You will then have to enter the desired user name : symfonyapi and the password.

If you want to use an external terminal, simply enter the following command: ssh symfonyapi@ssh-symfonyapi.alwaysdata.net and then enter the password.
Installing Composer
Although Composer is available on the server, it is version 1. This version will cause problems when installing the libraries. We will have to install version 2.
We can check which version of composer is currently used on the server by running the following command.
composer -v
If the displayed version is 2.x.x, we're good. But if the displayed version is 1.x.x, then we'll have to install version 2.
To do this, go to the root of our project which should be in the /home/symfonyapi/www directory. To change directory and go there, run the following command.
cd ~/www
Then, we will simply follow the instructions proposed in the documentation of Composer. Thus, as indicated, to install Composer, we will execute the following commands.
php -r "copy('https://getcomposer.org/installer', 'composer-setup.php');"
php -r "if (hash_file('sha384', 'composer-setup.php') === '55ce33d7678c5a611085589f1f3ddf8b3c52d662cd01d4ba75c0ee0459970c2200a51f492d557530c71c15d8dba01eae') { echo 'Installer verified'; } else { echo 'Installer corrupt'; unlink('composer-setup.php'); } echo PHP_EOL;"
php composer-setup.php
php -r "unlink('composer-setup.php');"
Let's check that the version installed is version 2.
php composer.phar -v
Now the version should be 2.x.x. This is perfect.
1.x.x, simply run the command php composer.phar self-update --2. This will update Composer to version 2.Installation of dependencies
As for our local project, we will use Composer to manage and install the libraries necessary for our project to work.
To install the dependencies, we will run the following command.
php composer.phar install
Entry point configuration
By default, the entry point of our application is the www directory, which corresponds to our entire project. We will have to modify this value so that the server uses the directory www/public as entry point.
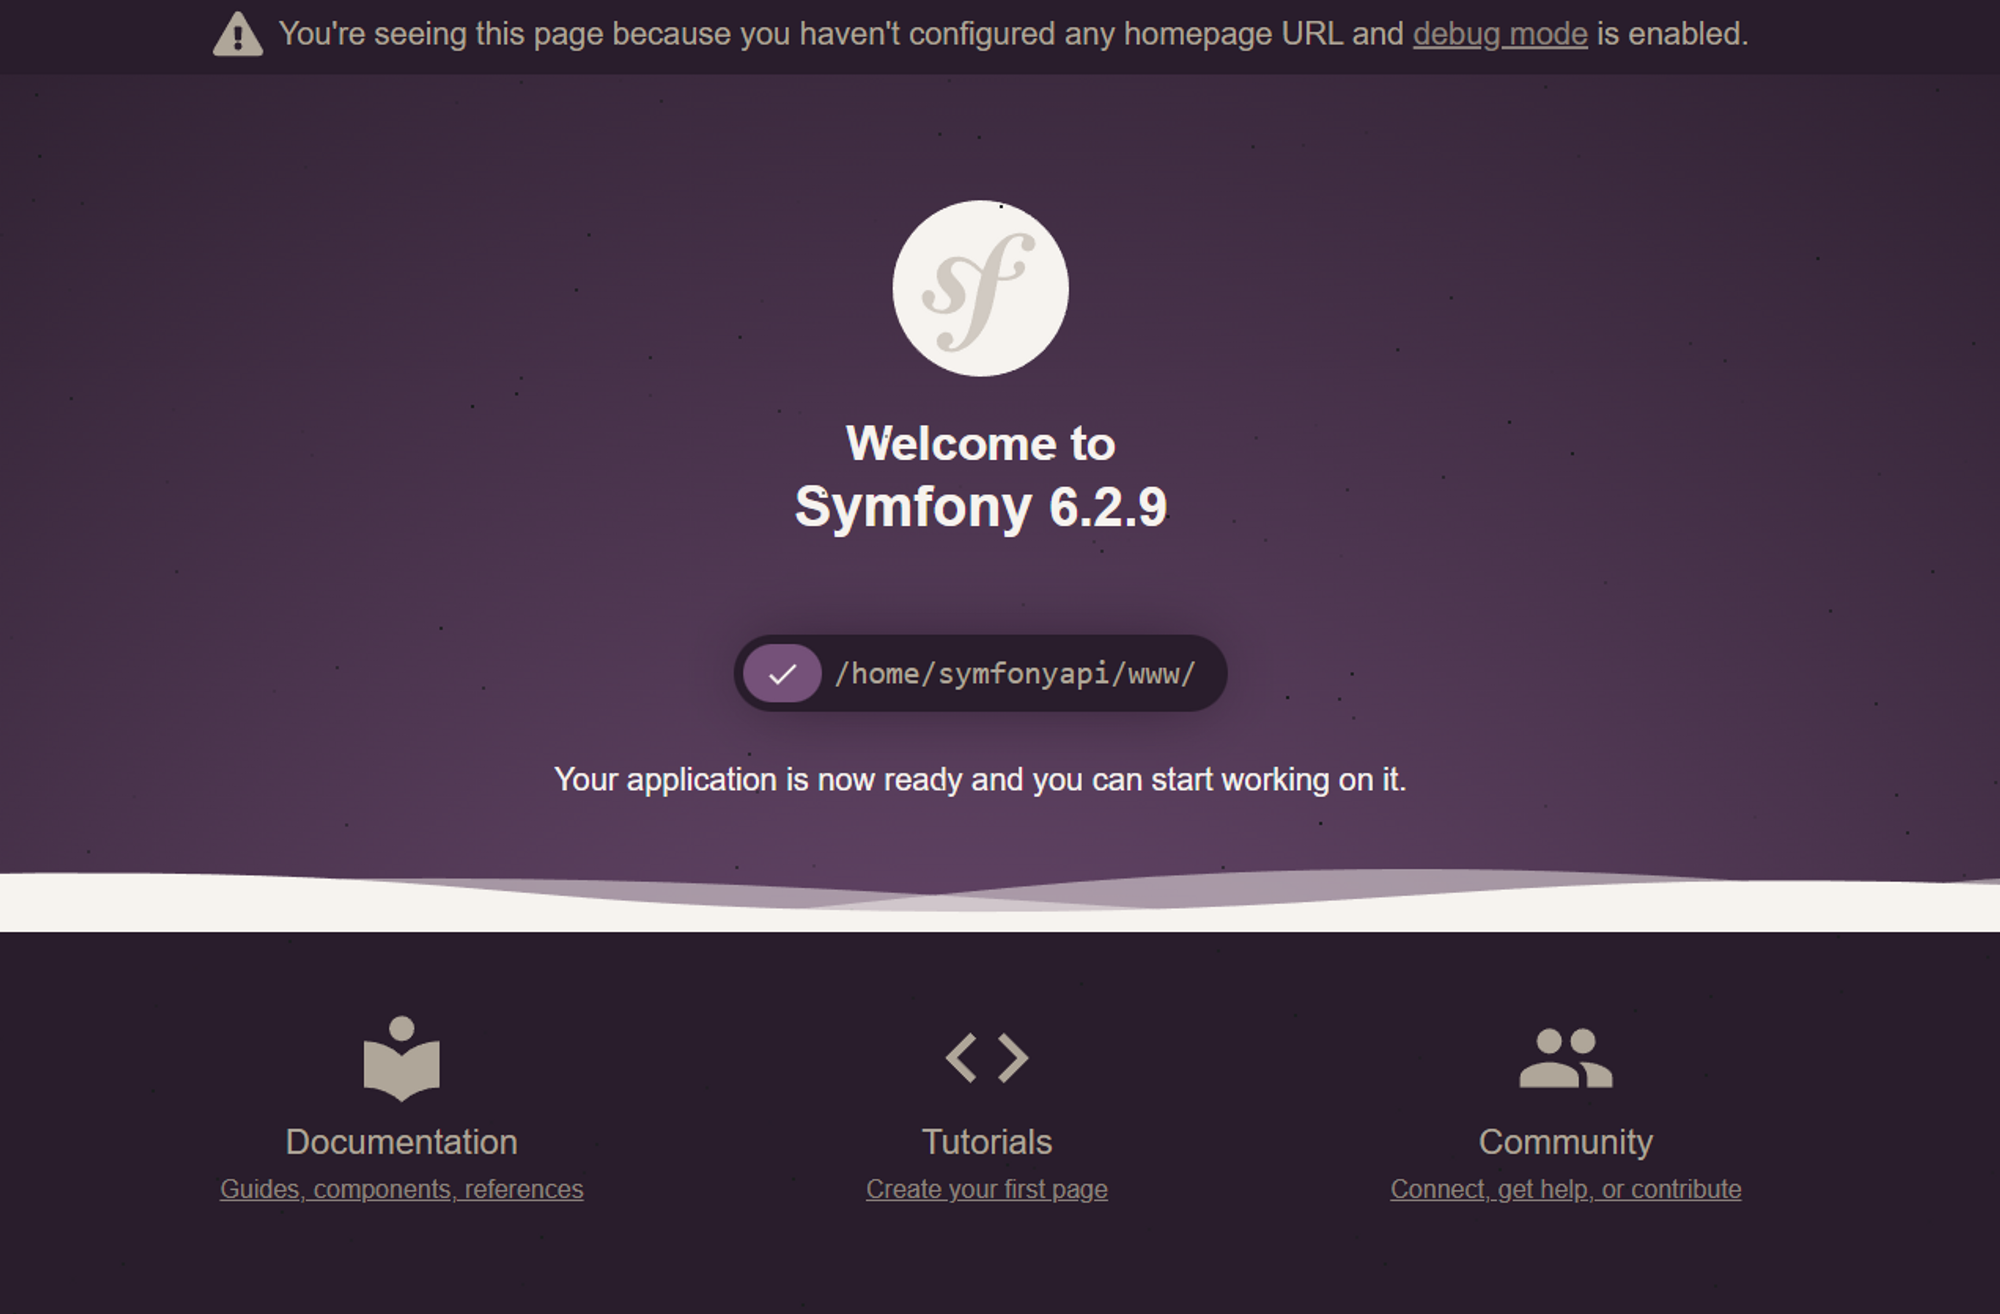
Indeed, if we go to the url of the project http://symfonyapi.alwaysdata.net/, we see the default page.

To change the entry point, go to the Web section and then Sites, then click on the settings icon for the site in question.
In the Configuration part, we'll change the Root directory field to /www/public and then click Submit at the bottom of the page.
Now, if we update the project url, we should see a Symfony page.
Creating the database
First of all, we will have to create the database that will contain all our data.
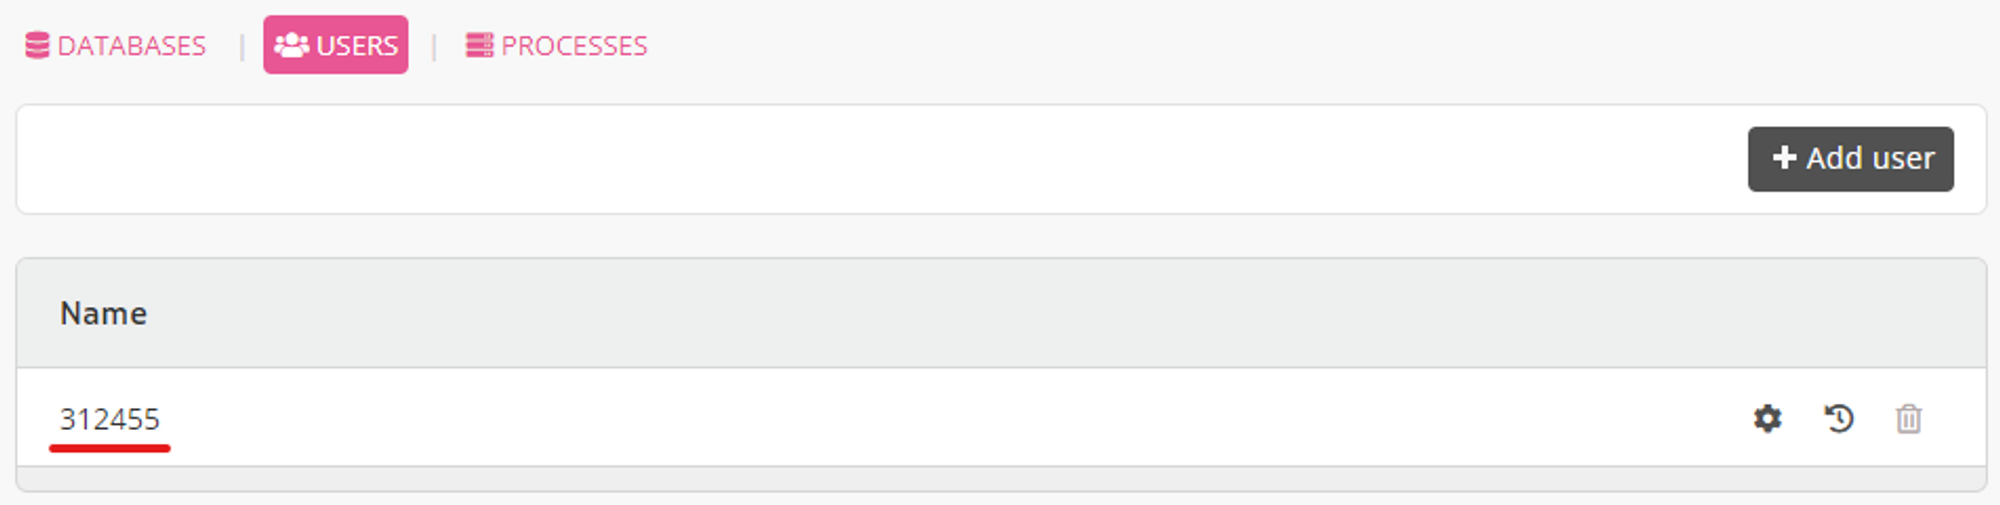
To do this, go to the Databases section and then MySQL. In the Databases tab, click on the Add Database button
In the form, displayed, fill in the name of the database. For example, put the name symfonyapi_db.
Then check that in the Permissions section, the All Rights option is selected. This way the user 312455 will be able to read and write to the database.
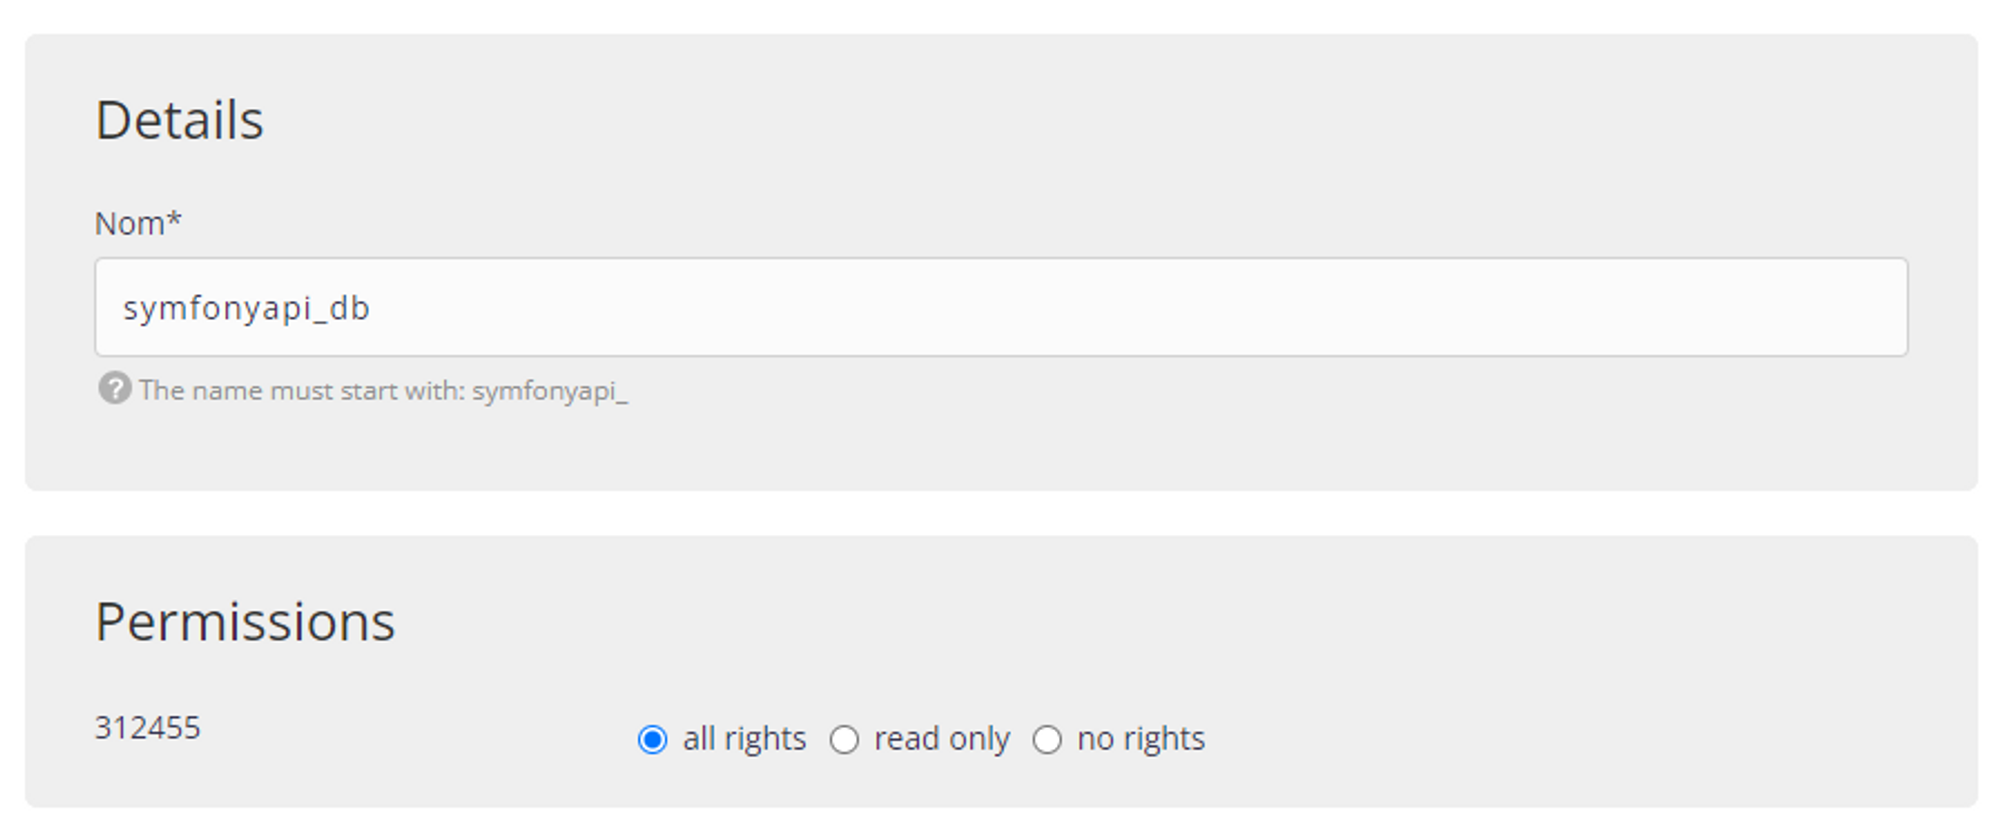
Then confirm by clicking on the Submit button.
Setting up the environment variables
We will now take care of the environment variables located in the .env file. Indeed, the variables in these files correspond to our development environment and not to the production one.
First of all, we will modify the .env file based on the development file. To do this, in your terminal, run the command :
cp .env.local .env
Then, we will modify its content to change the APP_ENV variable as well as the DATABASE_URL variable.
To do this, we will use the nano command.
nano .env
Then, we will fill in the following content.
###> symfony/framework-bundle ###
APP_ENV=prod
APP_SECRET=90e4e5d389dbd391301727099967a616
###< symfony/framework-bundle ###

###> doctrine/doctrine-bundle ###
DATABASE_URL="mysql://db_user:db_password@db_host:db_port/db_name?serverVersion=mariadb-10.6&charset=utf8mb4"
###< doctrine/doctrine-bundle ###
.env
Don't forget to replace the value of the fields db_user, db_password, db_host, db_port and db_name with your values.
- You will find the user name in the
Databasessection and thenMySQL. Then you just have to click on theUserstab.
- Concerning the
db_passwordfield, it is the password you have filled in when creating the project on AlwaysData. - As for the
db_hostfield, it is simply the url of the database server proposed by AlwaysData. This url is available in the sectionDatabasesthenMySQL.

- For
db_port, it is port 3306 - Finally, for the
db_namefield, we will fill in the name we gave when creating the database (symfonyapi_db)
serverVersion field in the DATABASE_URL variable. To find this value, you will have to go to the PhpMyAdmin tool offered by AlwaysData. In the section Databases then MySQL, click on phpmyadmin. Then, enter the user name and the password of the user for the database.You will then find the MariaDB version on the right side for the
Server Version field.You will also need to prefix the version with
mariadb- which will give serverVersion=mariadb-10.6.
Finally, we will delete the .env.local and .env.test files as they no longer make sense in this environment.
rm .env.local .env.test
Creation of the tables
To create the different tables, we will use the migrations that were created during the development.
php bin/console doctrine:migrations:migrate
Or simply
php bin/console d:m:m
Creating fake data
Once again, we will use the same procedure as in development. To create fake data, we will use the DataFixtures.
php bin/console doctrine:fixtures:load
Or simply
php bin/console d:f:l
Unfortunately, this command does not work in a production environment. To correct this problem, we will temporarily switch back to dev mode in the .env file.
nano .env
Then modify the APP_ENV variable.
APP_ENV=dev
Now, if we run the command again
php bin/console d:f:l
This should work. We now have our tables and a dataset. We can check this by going to the phpmyadmin interface.

All that remains is to switch back to the production environment by modifying the .env file and setting the APP_ENV variable back to prod.
Apache configuration
Now, if we update the url of our project and try to go to one of the url like /api/todos, we notice that a 404 Not Found page is generated.
This problem is simply due to a lack of configuration with Apache.
To fix this problem, we will install a last library on the server: symfony/apache-pack. As indicated in the documentation, this library allows to enable URL rewriting or to redirect all requests to the index.php file located in the public folder of the project.
Like all the other libraries, we will install it by running the following command.
php composer.phar require symfony/apache-pack
You will then be asked a question: Do you want to execute this recipe? Click y to accept.
Now, if we update the project url and go to /api/todos, we see our data.
[
"data": [
{
"id": 1,
"title": "Adipisci velit, sed quia non numquam eius modi tempora incidunt ut labore et dolore magnam aliquam quaerat voluptatem",
"createdAt": "2025-05-08T15:23:00+00:00",
"updatedAt": "2025-05-08T15:23:00+00:00",
"completed": false
},
{
"id": 2,
"title": "Ut enim ad minima veniam, quis nostrum exercitationem ullam corporis suscipit",
"createdAt": "2025-05-08T15:23:00+00:00",
"updatedAt": "2025-05-08T15:23:00+00:00",
"completed": false
},
{
"id": 3,
"title": "Quis autem vel eum iure reprehenderit qui in ea voluptate velit esse quam",
"createdAt": "2025-05-08T15:23:00+00:00",
"updatedAt": "2025-05-08T15:23:00+00:00",
"completed": false
},
{
"id": 4,
"title": "Nemo enim ipsam voluptatem quia voluptas sit aspernatur aut odit aut fugit",
"createdAt": "2025-05-08T15:23:00+00:00",
"updatedAt": "2025-05-08T15:23:00+00:00",
"completed": false
},
{
"id": 5,
"title": "Quae ab illo inventore veritatis et quasi architecto beatae vitae dicta sunt explicabo",
"createdAt": "2025-05-08T15:23:00+00:00",
"updatedAt": "2025-05-08T15:23:00+00:00",
"completed": false
},
],
"pagination": {
"total": 10,
"count": 5,
"offset": 0,
"items_per_page": 5,
"total_pages": 2,
"current_page": 1,
"has_next_page": true,
"has_previous_page": false
}
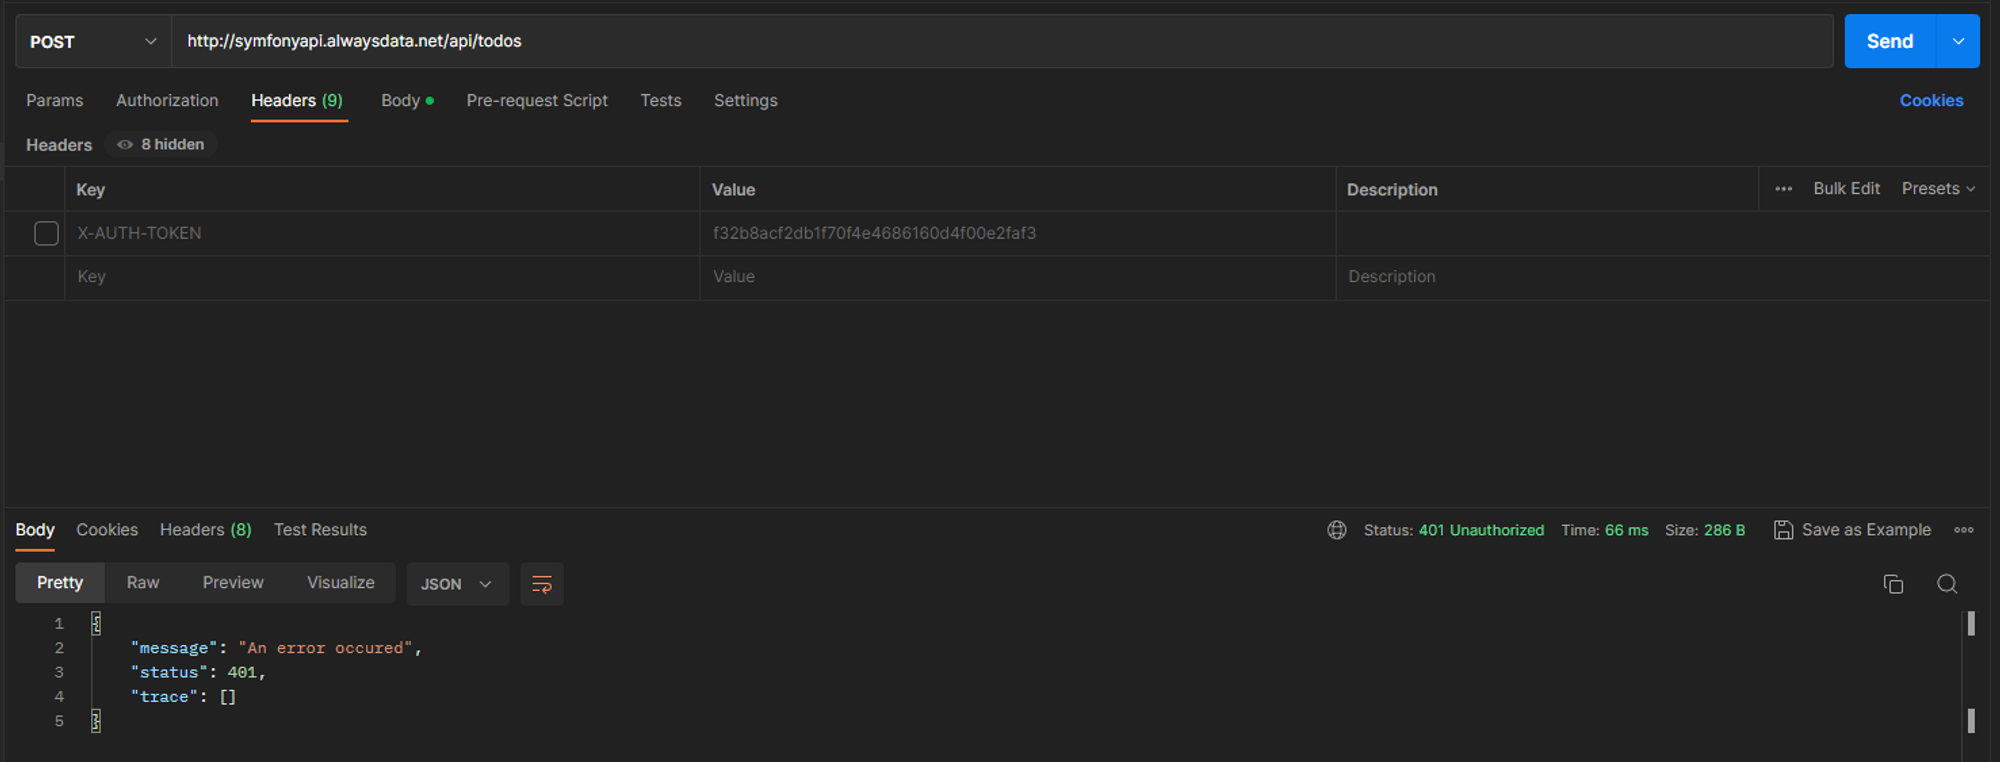
]With Postman, we can also test other routes for security
For example, for the /api/todos route with the POST method, if the X-AUTH-TOKEN header is not filled in, a 401 error is returned.
In summary
That's it, you have successfully put in production an API using Symfony.
In this lesson, we have the main steps to put a Symfony project in production. We have reviewed the database configuration, the server configuration, the SSH and FTP accounts, ...
Finally, the process to put a Symfony application in production is very often similar.
- File transfer
- Database configuration
- Change of environment variables
- Launching migrations to create tables
- (Optional) Creating a dataset
- Installing the
symfony/apache-packlibrary
These steps will often be the same.


